Attention, cet article a plus d'une année d'ancienneté. Il est possible que les informations présentées ne soient plus à jour, spécialement dans le cadre d'un article technique.
Salut à tous !
Aujourd’hui on va voir comment installer et configurer SwiftKey 3, qui est le clavier Android indispensable pour tous ceux qui tape plus de 5 lignes par jours !
Comme d’habitude, on commence bien évidemment par l’installation de l’application, rien de bien transcendant alors on va passer dessus rapidement.
[tabs slidertype= »images » auto= »yes » autospeed= »3000″] [imagetab width= »320″ height= »480″]https://www.abyssproject.net/wp-content/uploads/2012/11/swiftkey3install-1.jpg[/imagetab] [imagetab width= »320″ height= »480″]https://www.abyssproject.net/wp-content/uploads/2012/11/swiftkey3install-2.jpg[/imagetab] [imagetab width= »320″ height= »480″]https://www.abyssproject.net/wp-content/uploads/2012/11/swiftkey3install-3.jpg[/imagetab] [imagetab width= »320″ height= »480″]https://www.abyssproject.net/wp-content/uploads/2012/11/swiftkey3install-4.jpg[/imagetab] [imagetab width= »320″ height= »480″]https://www.abyssproject.net/wp-content/uploads/2012/11/swiftkey3install-5.jpg[/imagetab] [imagetab width= »320″ height= »480″]https://www.abyssproject.net/wp-content/uploads/2012/11/swiftkey3install-6.jpg[/imagetab] [imagetab width= »320″ height= »480″]https://www.abyssproject.net/wp-content/uploads/2012/11/swiftkey3install-7.jpg[/imagetab] [/tabs]
Ensuite, on va lancer SwiftKey pour la première fois, et on va passer à la configuration.
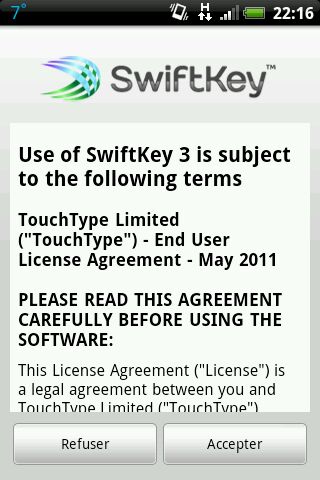
Tout d’abord, l’application va nous afficher les CGU
Bien évidemment, on accepte les conditions, et on va choisir notre 1ère langue qui sera la langue par défaut du clavier.
[tabs slidertype= »images » auto= »yes » autospeed= »3000″] [imagetab width= »320″ height= »480″]https://www.abyssproject.net/wp-content/uploads/2012/11/swiftkey3install-9.jpg[/imagetab] [imagetab width= »320″ height= »480″]https://www.abyssproject.net/wp-content/uploads/2012/11/swiftkey3install-10.jpg[/imagetab] [/tabs]
Moi je vais sélectionner Français ( France ), et on va le laisser télécharger la langue tranquillement

On va maintenant activer le clavier Swiftkey dans les paramètres d’Android en cliquant tout simplement
[tabs slidertype= »images » auto= »yes »] [imagetab width= »320″ height= »480″]https://www.abyssproject.net/wp-content/uploads/2012/11/swiftkey3install-12.jpg[/imagetab] [imagetab width= »320″ height= »480″]https://www.abyssproject.net/wp-content/uploads/2012/11/swiftkey3install-13.jpg[/imagetab] [imagetab width= »320″ height= »480″]https://www.abyssproject.net/wp-content/uploads/2012/11/swiftkey3install-14.jpg[/imagetab] [imagetab width= »320″ height= »480″]https://www.abyssproject.net/wp-content/uploads/2012/11/swiftkey3install-15.jpg[/imagetab] [/tabs]
N’oublier pas d’appuyer sur la touche retour de votre téléphone, pour revenir à la configuration de SwiftKey, et si vous ne disposez pas de cette fonctionnalité, glisser la barre du haut vers le bas pour faire apparaître les dernières applications lancées, et retourner sur Swiftkey.
On va maintenant définir Swiftkey comme le clavier par défaut à utiliser
[tabs slidertype= »images » auto= »yes » autospeed= »3000″] [imagetab width= »320″ height= »480″]https://www.abyssproject.net/wp-content/uploads/2012/11/swiftkey3install-16.jpg[/imagetab] [imagetab width= »320″ height= »480″]https://www.abyssproject.net/wp-content/uploads/2012/11/swiftkey3install-17.jpg[/imagetab] [/tabs]
Et on va choisir son style de saisie, en gros, votre façon de taper les messages
[tabs slidertype= »images » auto= »yes » autospeed= »3000″] [imagetab width= »320″ height= »480″]https://www.abyssproject.net/wp-content/uploads/2012/11/swiftkey3install-18.jpg[/imagetab] [imagetab width= »320″ height= »480″]https://www.abyssproject.net/wp-content/uploads/2012/11/swiftkey3install-19.jpg[/imagetab] [/tabs]
Swiftkey 3 apprend votre façon d’écrire depuis les sms que vous envoyé, et vous pouvez aussi l’autoriser à apprendre votre façon d’écrire depuis Facebook, Twitter et Gmail.
[tabs slidertype= »images » auto= »yes » autospeed= »3000″] [imagetab width= »320″ height= »480″]https://www.abyssproject.net/wp-content/uploads/2012/11/swiftkey3install-20.jpg[/imagetab] [imagetab width= »320″ height= »480″]https://www.abyssproject.net/wp-content/uploads/2012/11/swiftkey3install-21.jpg[/imagetab] [/tabs]
Et voilà, c’est fini !

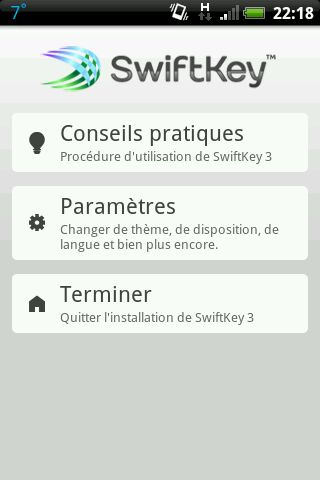
Non, on va pas s’arrêter en si bon chemin, on va aussi regarder dans un premier temps comment changer le thème du clavier, pour cela, cliquez sur paramètres.
Il vous suffit ensuite de cliquer sur thème, et de choisir l’élu de vos doigts
[tabs slidertype= »images » auto= »yes » autospeed= »3000″] [imagetab width= »320″ height= »480″]https://www.abyssproject.net/wp-content/uploads/2012/11/swiftkey3install-23.jpg[/imagetab] [imagetab width= »320″ height= »480″]https://www.abyssproject.net/wp-content/uploads/2012/11/swiftkey3install-24.jpg[/imagetab] [imagetab width= »320″ height= »480″]https://www.abyssproject.net/wp-content/uploads/2012/11/swiftkey3install-25.jpg[/imagetab] [/tabs]
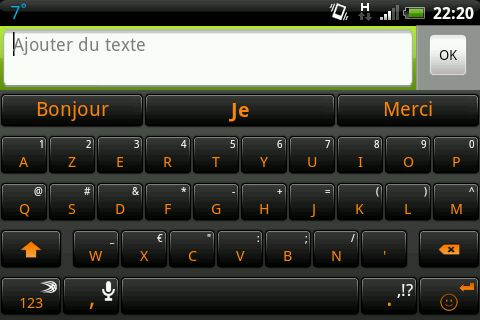
Voilà 2 exemples de ce que ça donne avec le thème citrouille :


Je sais pas si vous savez, mais SwiftKey gère jusqu’à 3 langues actives en même temps, alors on va apprendre comment les ajoutées
Retournez dans les paramètres de SwiftKey ( en vous rendant dans l’application ), et allez dans « Langues et dispositions »
Ajoutez les langues que vous souhaitez utiliser en plus, pour ma part, ça sera Anglais Américain, et Italien. Rien de plus simple, cliquez juste sur la langue.
[tabs slidertype= »images » auto= »yes » autospeed= »3000″] [imagetab width= »320″ height= »480″]https://www.abyssproject.net/wp-content/uploads/2012/11/swiftkey3install-29.jpg[/imagetab] [imagetab width= »320″ height= »480″]https://www.abyssproject.net/wp-content/uploads/2012/11/swiftkey3install-30.jpg[/imagetab] [imagetab width= »320″ height= »480″]https://www.abyssproject.net/wp-content/uploads/2012/11/swiftkey3install-31.jpg[/imagetab] [imagetab width= »320″ height= »480″]https://www.abyssproject.net/wp-content/uploads/2012/11/swiftkey3install-32.jpg[/imagetab] [imagetab width= »320″ height= »480″]https://www.abyssproject.net/wp-content/uploads/2012/11/swiftkey3install-33.jpg[/imagetab] [/tabs]
Pas besoin de configuration supplémentaire, et pour indiquer au clavier que vous souhaitez utiliser telle ou telle langue, taper simplement un mot de cette langue comme dans les images ci dessous
[tabs slidertype= »images » auto= »yes » autospeed= »3000″] [imagetab width= »320″ height= »480″]https://www.abyssproject.net/wp-content/uploads/2012/11/swiftkey3install-34.jpg[/imagetab] [imagetab width= »320″ height= »480″]https://www.abyssproject.net/wp-content/uploads/2012/11/swiftkey3install-35.jpg[/imagetab] [imagetab width= »320″ height= »480″]https://www.abyssproject.net/wp-content/uploads/2012/11/swiftkey3install-36.jpg[/imagetab] [imagetab width= »320″ height= »480″]https://www.abyssproject.net/wp-content/uploads/2012/11/swiftkey3install-38.jpg[/imagetab] [imagetab width= »320″ height= »480″]https://www.abyssproject.net/wp-content/uploads/2012/11/swiftkey3install-39.jpg[/imagetab] [/tabs]
Et voilà, c’est fini pour aujourd’hui, pour dire ce que vous en avez penser, c’est par ici -> http://forum.abyssproject.net/showthread.php?14-Swiftkey-3-Installation-et-configuration


